一、路由的理解
路由是指导用户界面导航的一种机制。它通过映射 URL 到应用程序的不同视图组件来实现页面间的切换和导航。
二、路由基本切换效果
路由基本切换效果指的是当用户在应用程序中进行页面导航时,通过路由可以实现页面的切换,从而展示不同的视图组件。
VUE文件
<template>
  <h1 class="title">Vue路由测试</h1>
  <div class="actives">
    <RouterLink to="/home" active-class="activeclass" class="active"  tag="button">首页</RouterLink>
    <RouterLink to="/home" tag="button" class="button-link">码农</RouterLink>
    <RouterLink :to="{ path: '/news' }" active-class="activeclass" class="active">新闻</RouterLink>
    <RouterLink :to="{ name: '关于' }" active-class="activeclass" class="active">关于</RouterLink>
  </div>
  <div class="routerbox">
    <RouterView></RouterView>
  </div>
</template>

<script lang="ts" setup name="Person">
import { RouterLink, RouterView } from 'vue-router'
import { ref, reactive, watch, onMounted } from 'vue';
</script>
</script>
<style lang='scss' scoped>
h1 {
  text-align: center;
}

.actives {
  display: flex;
  justify-content: space-evenly;
  .button-link {
    display: inline-block;
    padding: 8px 16px;
    background-color: #007bff;
    color: #fff;
    border: none;
    border-radius: 4px;
    text-decoration: none;
    cursor: pointer;
    font-size: 16px;
  }
  .active {
    background-color: #808080;
    color: #fff;
    text-decoration: none;
    width: 100px;
    height: 50px;
    border-radius: 10%;
    text-align: center;
    line-height: 50px;
    font-size: 20px;
  }

  .active:hover {
    background-color: #354139;
    color: #ECC980;
  }

  .activeclass {
    background-color: #354139;
    color: #ECC980;
    text-decoration: none;
    width: 100px;
    height: 50px;
    border-radius: 10%;
    text-align: center;
    line-height: 50px;
    font-size: 20px;
  }
}

.routerbox {
  margin: 0 auto;
  margin-top: 20px;
  width: 80%;
  height: 200px;
  border: 1px solid #000;
  border-radius: 10px;
  padding: 20px;
}
</style>
manin.ts文件
// 创建一个路由器,并暴露出去
//第一步:引入createRouter
import { createRouter, createWebHistory } from 'vue-router'

//引入一个一个要呈现组件
import Home from '@/views/Home.vue'
import News from '@/views/News.vue'
import About from '@/views/About.vue'

// 第二步:创建路由器
const router = createRouter({
  history: createWebHistory(),//路由器的工作模式
  routes: [//一个一个的路由规则
    {// 将默认路由重定向到 '/home'
      path: '/',
      name: '首页',
      redirect: '/home'
    },
    {
      path: '/home',
      name: '首页',
      component: Home
    },
    {
      path: '/news',
      name: '新闻',
      component: News
    },
    {
      path: '/about',
      name: '关于',
      component: About
    }
  ]
})

export default router
main.ts
//引入createApp用于创建应用
import { createApp } from 'vue'
//引入App根组件
import App from './App.vue'
// 引入路由器
import router from './route/route'

//创建一个应用
const app = createApp(App)
// 使用路由器
app.use(router)
// 挂载整个应用到app容器中
app.mount('#app')

三、路由的两个注意点
1.路由组件通常存放在
pages或views文件夹,一般组件通常存放在components文件夹。
2.通过点击导航,视觉效果上“消失” 了的路由组件,默认是被卸载掉的,需要的时候再去挂载。
四、路由器工作模式
1.history模式
优点:
- URL 更加美观,不带有 #,更接近传统网站 URL
- 利于 SEO 优化
缺点:
- 后期项目上线,需要服务端配合处理路径问题,否则刷新会有 404 错误
const router = createRouter({
	history:createWebHistory(), //history模式

})
网址显示:http://localhost:5173/home
hash模式
优点:
- 无需服务端配合,即可运行
- 兼容性更好
缺点:
- URL 带有 #,不太美观
- 对 SEO 优化相对较差
const router = createRouter({
	history:createWebHashHistory(), //hash模式

})
网址显示:http://localhost:5173/#/home
⭐不同点在于有无/#
五、路由 to 的两种写法
在 Vue 3 + TypeScript 中,可以使用对象字面量或者字符串形式来指定 to 属性。
对象字面量:
to="{ name: 'Home' }"
字符串形式:to="/home"
六、路由命名路由
命名路由是指为特定路由指定一个名称,以便在代码中引用。这样做有助于在应用程序中进行路由导航时更清晰地指定目标路由。
// 创建路由器
const router = createRouter({
  history: createWebHistory(),//路由器的工作模式
  routes: [//一个一个的路由规则
    {// 将默认路由重定向到 '/home'
      path: '/',
      redirect: '/home'
    },
    {
      path: '/home',
      name: '首页',
      component: Home
    },
    {
      path: '/news',
      name: '新闻',
      component: News
    },
    {
      path: '/about',
      name: '关于',
      component: About
    }
  ]
})
export default router
七、路由嵌套路由
路由嵌套是指在一个路由下定义子路由,通过这种方式可以构建复杂的页面结构和导航层次。
- 编写
News的子路由:Detail.vue - 配置路由规则,使用
children配置项:
const router = createRouter({
  history: createWebHistory(),//路由器的工作模式
  routes: [//一个一个的路由规则
    {
      path: '/news',
      name: '新闻',
      component: '@/views/News.vue',
      children: [
        {
          path: '/detal',
          component: '@/views/detal.vue'
        }
      ]
    }
  ]
})
export default router
- 跳转
<li v-for="item in newsList" :key="item.id">
	<RouterLink to="/news/detal" :active-data="item">{{ item.title }}</RouterLink>
</li>
- 记得去
news组件中预留一个<router-view>
<template>
  <div class="flex">
    <div class="news">
      <ul>
        <li v-for="item in newsList" :key="item.id">
          <RouterLink to="/news/detal">{{ item.title }}</RouterLink>
        </li>
      </ul>
    </div>
    <div class="router-content">
      <RouterView></RouterView>
    </div>
  </div>
</template>
<script setup lang="ts" name="News">
import { ref, reactive, watch, onMounted } from 'vue';
import { RouterLink, RouterView } from 'vue-router';
const newsList = ref([
  { id: 1, title: '标题1', content: '内容1' },
  { id: 2, title: '标题2', content: '内容2' },
  { id: 3, title: '标题3', content: '内容3' },
  { id: 4, title: '标题4', content: '内容4' },
  { id: 5, title: '标题5', content: '内容5' },
])
</script>
<style lang='scss' scoped>
.flex {
  display: flex;
  justify-content: flex-start;

  .news {
    ul {
      margin: 0;
      padding: 0 10px 0 0;

      li {
        list-style-type: none;

        a {
          text-decoration: none;
        }
      }
    }
  }

  .router-content {
    width: 80%;
    border-radius: 10px;
    padding: 5px;
    border: #000 solid 1px;
  }
}
</style>
八、路由传参
- 路由 query 参数
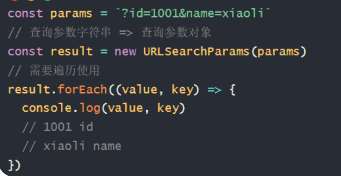
Query 参数是指在 URL 中以 ? 开头的参数,用于传递额外的信息给路由目标组件。在 Vue 3 + TypeScript 中,可以通过 $route.query 来获取这些参数。
1.query参数
(1)传递参数
<!-- 方式一:跳转并携带query参数(to的字符串写法) -->
<RouterLink :to="`/news/detail?id=${item.id}&title=${item.title}&content=${item.content}`">{{ item.title }}
</RouterLink>

<!-- 方式二:跳转并携带query参数(to的对象写法) -->
<RouterLink :to="{
 path: '/news/detail',
 query: {
  id: item.id,
  title: item.title,
  content: item.content
 }
}">{{ item.title }}</RouterLink>
(2)接收参数:
import { ref, watchEffect, toRefs } from 'vue'
import { useRoute } from 'vue-router'
const route = useRoute()
let { query } = toRefs(route)
(3)路由配置
const router = createRouter({
 history: createWebHistory(),//路由器的工作模式
 routes: [
  {
   path: '/news',
   name: '新闻',
   component: News,
   children: [
    {
	 name:'detail',
	 path: '/news/detail',
	 component: Detal
	}
  ]
 }
])

export default router
2.params参数
Params 参数是指在 URL 中使用动态路由参数的一种方式,通过这种方式可以在路由之间传递数据。在 Vue 3 + TypeScript 中,可以通过 $route.params 来获取这些参数。
(1)传递参数
<!-- 第一种方法 -->
<RouterLink :to="`/news/detail/${item.id}/${item.title}/${item.content}`">{{ item.title }}</RouterLink>

<!-- 第二种方法 -->
<RouterLink
 :to="{
  name: 'detail',
  params: {
   id: item.id,
   title: item.title,
   content: item.content,
  }
}">{{ item.title }}</RouterLink>
(2)接收参数
import { toRefs } from 'vue'
import { useRoute } from 'vue-router'
const route = useRoute()
let { params } = toRefs(route)
console.log(params.value);
(3)路由配置
const router = createRouter({
 history: createWebHistory(),//路由器的工作模式
 routes: [
  {
   path: '/news',
   name: '新闻',
   component: News,
   children: [
    {
	 name:'detail',
	 path: '/news/detail/:id/:title/:content?',//id和title参数是必须的,但content参数可以省略
	 component: Detal
	}
  ]
 }
])

export default router
注意:
备注1:传递
params参数时,若使用to的对象写法,必须使用name配置项,不能用path。
备注2:传递params参数时,需要提前在规则中占位。
九、路由 props 配置
让路由组件更方便的收到参数(可以将路由参数作为props传给组件)
(1)传递参数
const router = createRouter({
history: createWebHistory(),//路由器的工作模式
routes: [//一个一个的路由规则
{
path: '/news',
name: '新闻',
component: News,
children: [
{
name:'xiang',
path:'detail/:id/:title/:content',
component:Detail,
// ⭐⭐第一种写法:将路由收到的所有params参数作为props传给路由组件
props: true,
// ⭐⭐第二种写法:函数写法,可以自己决定将什么作为props给路由组件
props(route) {
return route.query
}
// 第三种写法(几乎用不到):对象写法,可以自己决定将什么作为props给路由组件
props :{
id:1,
title:'标题',
content:'内容'
}
]
}
]
})
export default router
等同于
<Detail :id="1" :title="标题" :content="内容" />这样的 prop传值
(2)接收参数
<template>
 <div>
  编号:{{ id }}
  标题:{{ title }}
  内容:{{ content }}
 </div>
</template>

<script lang="ts" setup name="Person">
 defineProps(['id','title','content',])
</script>
十、路由 replace 属性
replace 属性是指在导航时替换当前路由历史记录而不是添加新记录。在某些情况下,使用 replace 可以更好地管理路由历史。
- 作用:控制路由跳转时操作浏览器历史记录的模式。
- 浏览器的历史记录有两种写入方式:分别为
push和replace:
push是追加历史记录(默认值)。replace是替换当前记录。
- 开启
replace模式路由跳转时加了replace的路由,导航就不会留下历史记录
<RouterLink replace .......>News</RouterLink>
十一、路由编程式路由导航
编程式路由导航是指通过 JavaScript 代码来进行页面导航,可以在组件方法中使用 $router 对象来实现。
<template>
  <div>
    <button @click="navGetTo()">点我跳转新闻页</button>
  </div>
</template>
<script lang="ts" setup name="Person">
import { useRouter } from 'vue-router';
const router = useRouter()

function navGetTo() {
 router.push('/news')
}
</script>
应用场景:
符合条件跳转,登陆成功跳转个人主页、整点秒杀跳转鼠标滑过跳转等等
十二、路由重定向
路由重定向是指当用户访问某个特定路径时自动将其重定向到另一个路径,通常用于处理用户访问的旧路径或者错误路径。
 {
 // 将默认路由重定向到 '/home'
  path: '/',
  redirect: '/home'
 }
![[Flutter3] 记录Dio的简单封装(一)](https://img-blog.csdnimg.cn/direct/0c0d9f4dac5c4fb2af4fb3d19df17c65.png)


![[iOS]CocoaPods安装和使用](https://img-blog.csdnimg.cn/direct/cc42417e4af84707b6741df16c17fe91.png)